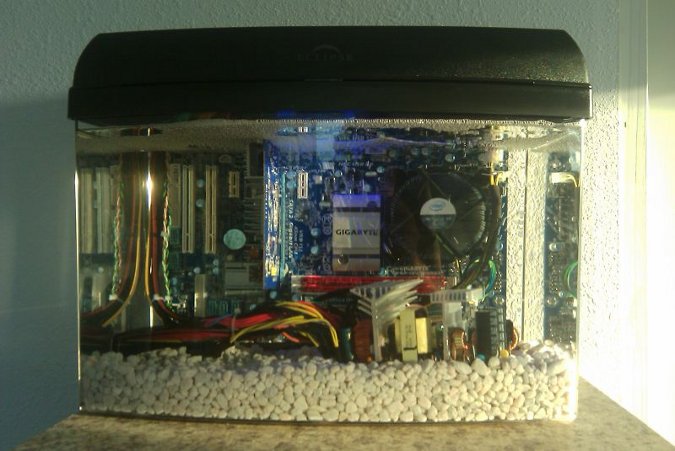
The computer that lives in an aquarium
I needed a new computer and this time I decided to go with something a little less dull than the motherboard in a tin box… I knew that the guys at pugetsystems.com had put together a computer similar to this and it had ran without problems for a couple years. They had used the Eclipse System 6 (6 gallon) aquarium and I went with that too since an ATX motherboard fits perfectly along the back wall.
Time to show Newegg some love…
Here is my parts list:
- GA-EP43T-USB3 GIGABYTE motherboard (Pros: 10 usb ports and support for 16GB ram)
- 4GB (for now) of G.SKILL RAM 1600 DDR3
- 430 watt Thermaltake PSU. I hate picking power supplies. This one had good reviews so I ran with it.
- fanless video card with the NVIDIA GeForce 9400 GT chip and 512MB memory
- Intel Core 2 Duo E7400 Wolfdale 2.8GHz processor
- Western Digital 640GB 7200 RPM hard drive
- Two Acer 20” monitors
- 5 gallons of mineral oil from my local veterinary
- Ubuntu 10.04
Here are a few pictures of the build process:
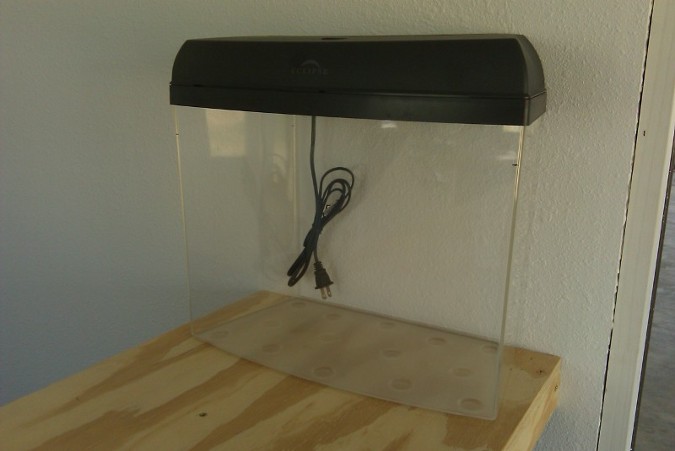
The unaltered aquarium
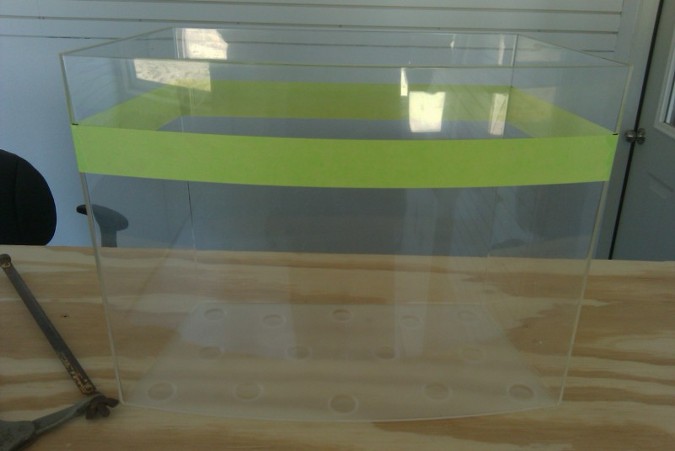
Marked with masking tape
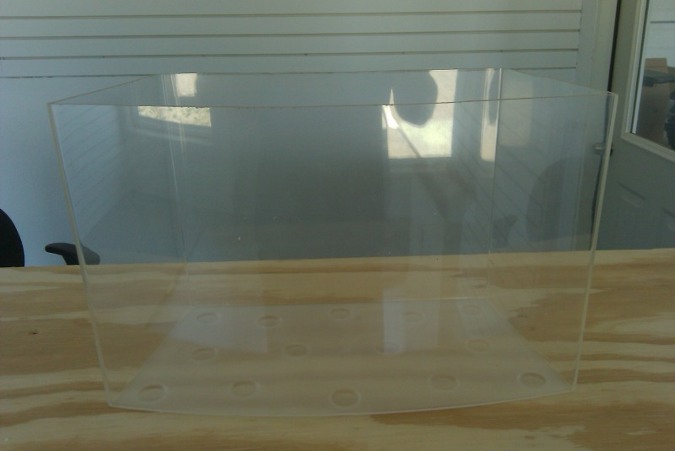
After having the top trimmed
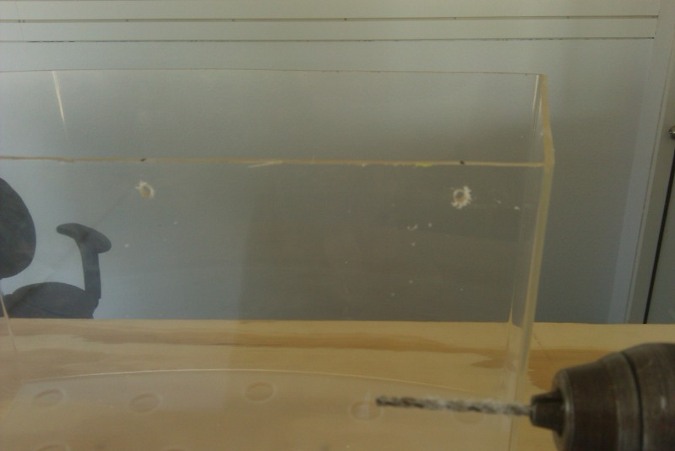
Holes drilled for the motherboard
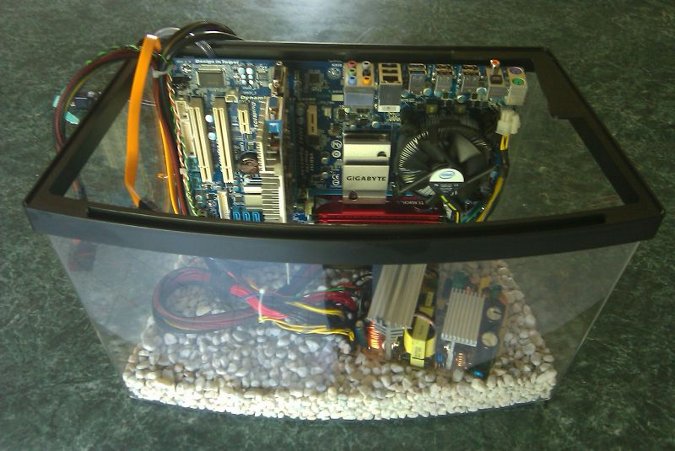
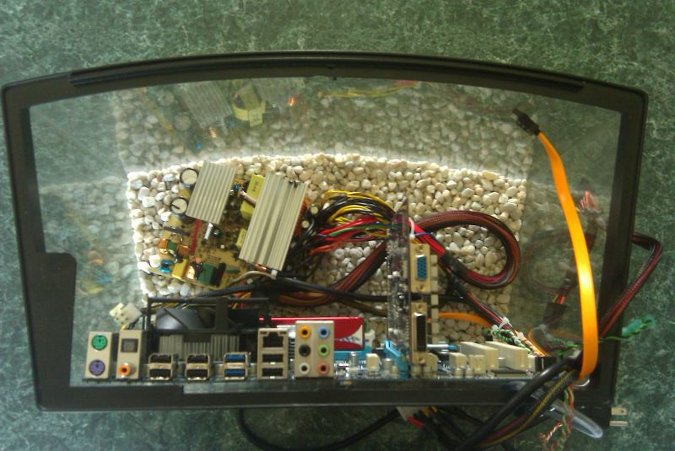
With everything fit in place
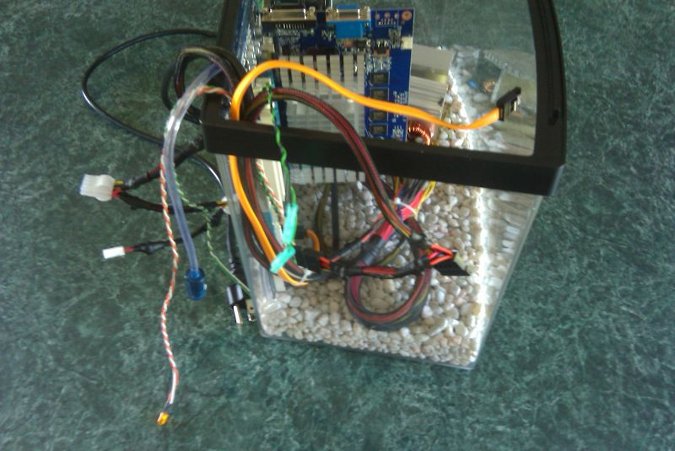
The side view of the wire routing
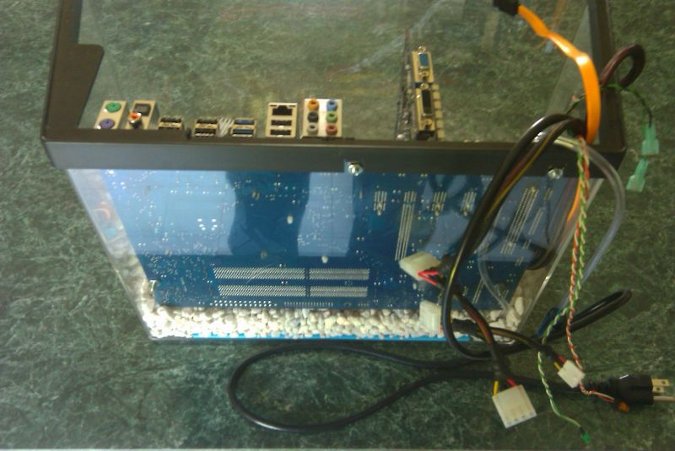
The back of the aquarium (and the bottom of the motherboard)
Top view with the lid off
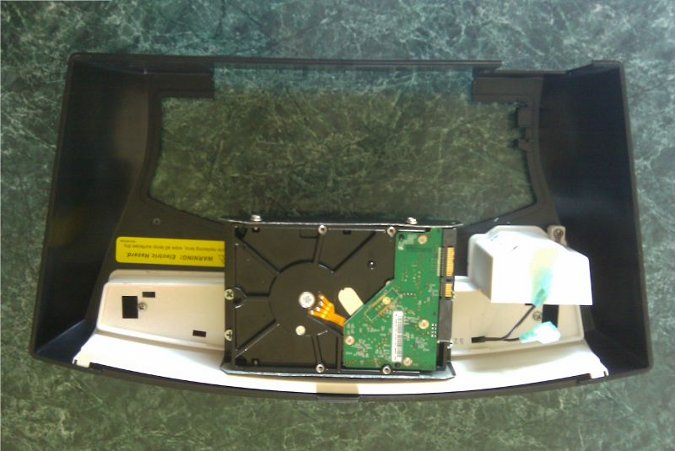
The hard drive is mounted to the bottom of the lid
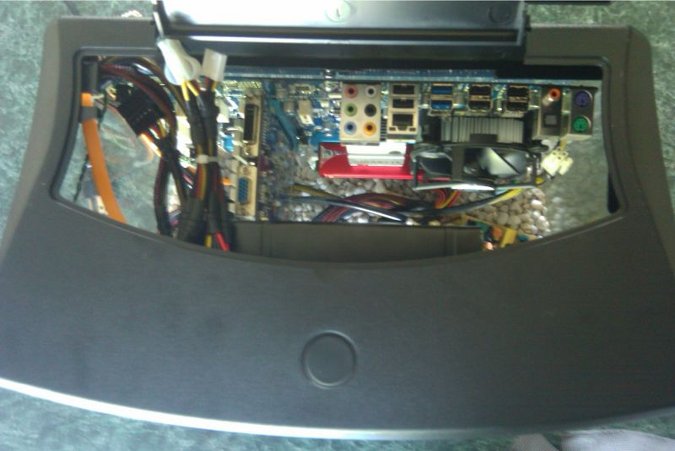
A view of the motherboard connections with the access lid open
All done!